Kitty, Kitty

As you might have guessed based on some previous nail art attempts, I did not paint these nails myself. This wasn't the first set of Sally Hansen Salon Effects Nail Polish Strips that I had purchased, but these were the first that I have actually used. I wanted something fancy, but I didn't have a lot of time to experiment and wait for my nails to dry, so these really fit the bill. They weren't too difficult to put on and there was no drying time (although I did put on a top coat, just to extend the mani). The only thing I didn't like was that the directions told you to stretch the strip over your nail, but I felt like it ended up shrinking and then my nail was showing around the polish. OK so there was one more thing I didn't like. You can remove these strips just using regular remover but it was a bit more difficult than that. The gold background removed easily, but the brown spots flecked all over the place and my fingers looked crazy. *Note - Kitty, Kitty really is the name of this pattern*
Sunset Over the Ocean
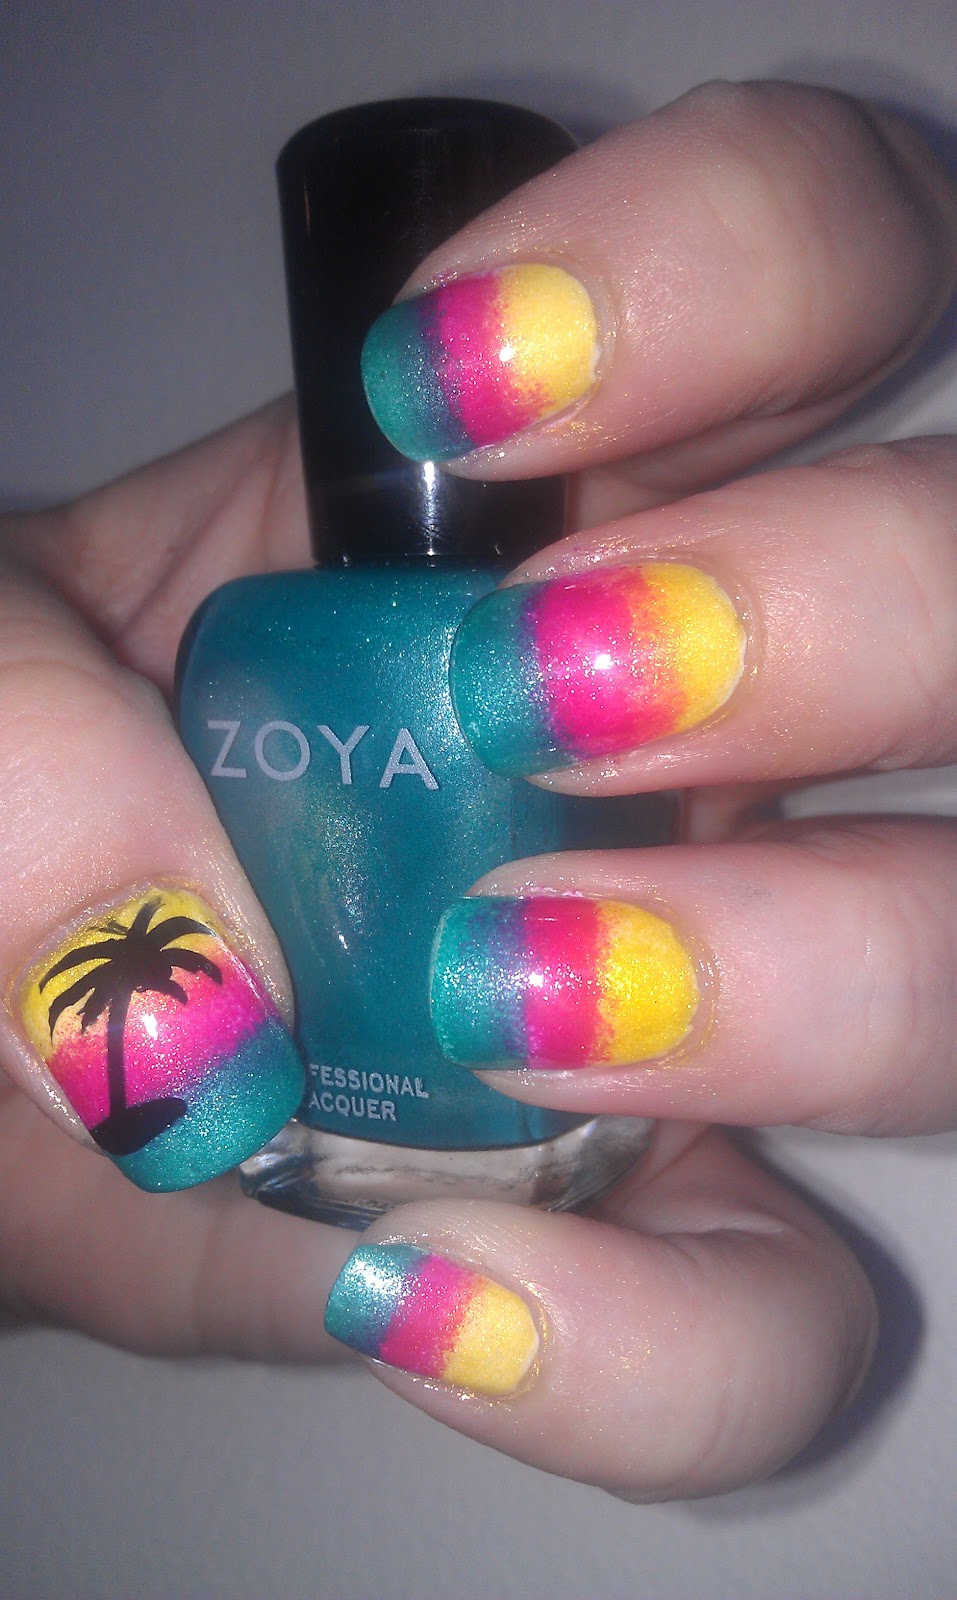
My attempt at a ocean/beach/sunset/palm tree/summer design. As I was doing this I think I was a little focused on the details and didn't see the big picture until the end; next time I would actually blend between the colors a bit more so there is actually a more obvious gradient, not just stripes.
The Process:
1. Started by painting by nails white (Sally Hansen - White On).
2. I used triangle cosmetic sponges to apply the rest of the polishes. I cut each one in half (the long way, if that makes sense), so that each large end is about the size of one nail. For my thumb I used an uncut sponge.
3. I started the actual sponging by painting a yellow stripe (Sally Hansen HD - Lite) at one end of the sponge and dabbed it at the base of the nail.
4. Followed the yellow with a pink stripe (Zoya - Kimber) on the sponge, even allowing them to overlap a bit. As I was dabbing the sponge on my nail, I lined the pink up just below the yellow. Like I mentioned before I would actually blend them into each other more by over lapping the pink over yellow and yellow over pink, to make a nice sunset orange.
5. Finally I repeated the previous step with the aqua color (Zoya - Zuza). The only difference was that after I lined up the sponge and layered the pink and aqua, I painted aqua on the edge of the sponge and dabbed some more polish on just the tip so I could get the color as opaque as I wanted.
6. Using a black striper I painted a palm tree on each of my thumbs. There wasn't a whole lot of technique here. I started with a little black mound, painted a curved line for the trunk, at the top of the tree I made an uneven circle for the palm fronds to come out of, finally each side of the tree got about four fronds of varying lengths.
No comments:
Post a Comment